
Design and build a simple product with fusion 360 and a 3D printer
The suction holder that came with the simplehuman squeegee kept falling, so we ended up leaving it on the sink countertop. That wasn't ideal, and my wife tasked me with coming up with a solution. I thought it would be a good idea to 3D design it and print it, because if you got a hammer everything looks like a nail.
I was able to put together a working solution in about an hour, including print time. I thought I may share it for people getting started with 3D design and printing. So I grabbed the caliper and measured the shower rod thickness (26mm) and the hole on the squeegee (11mm).
What I used:
Caliper - You want a somewhat snug fit, and since you are the one designing it and printing it, may as well get it!
Prusa MK3S - this is such a small and simple part that any printer should be able to do it, this one just happen to be the one I have.
Fusion 360 - the free (hobbyist) version is more than enough.
PrusaSlicer - takes the stl output from Fusion 360 and generates the gcode files that your printer can use.
PLA - Any color will do, I am actually thinking on reprinting it with PETG to better handle the temperature in the shower. I didn't do any post-printing work, but you probably want to coat it with something to prevent molding. I will update this post if I need to reprint it due to heat or humidity issues.
Steps:
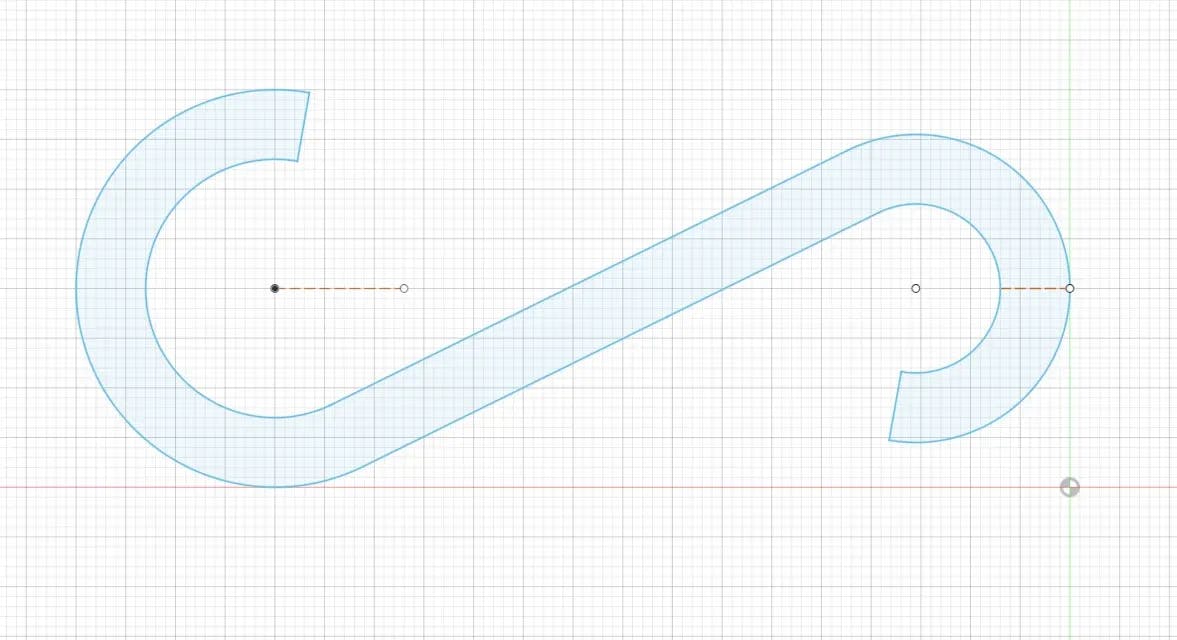
1 - Sketch. This is the starting point for Fusion 360 models. The more you know about the final product, the better the sketch can be and that makes the work easier later. To get the design below you just need to play with the line, circle and square designs. Add some dimensions to it and you are good to go.

2 - Trim. That is the scissors tool on the bar. It does a pretty good job at identifying the parts you don't need.

3 - Extrude. I made it 7mm tall. And then click on the edges and “fillet” them (it is one of the icons on the top). I used a 3mm fillet on each side and 1mm on the ends.
Hint: Using 3.5mm would have made the thing circular since 3.5 on each side makes it 7mm. Leaving 1mm of flat space will make it much easier to print, since the first layer will have more surface to stay attached to the bed

4 - Print it. This is 2077, ok 2020.. we print things in 3 dimensions. I used the default settings in the Prusa Slicer. Changed the infill to 40%, but the default was probably fine. No raft, no supports, no brim. The 1mm we left of flat space should be enough to make it work.

5 - Hang it like the piece of art it is and admire it.

Thank you for checking this out
Of course this website is a work in progress and I am trying stuff out in terms of content. I don't know what will be found to be more or less helpful, so please reach out and let me know! msg@msglab.co or say hi in the cyberdeck discord where I hang out as a mod!