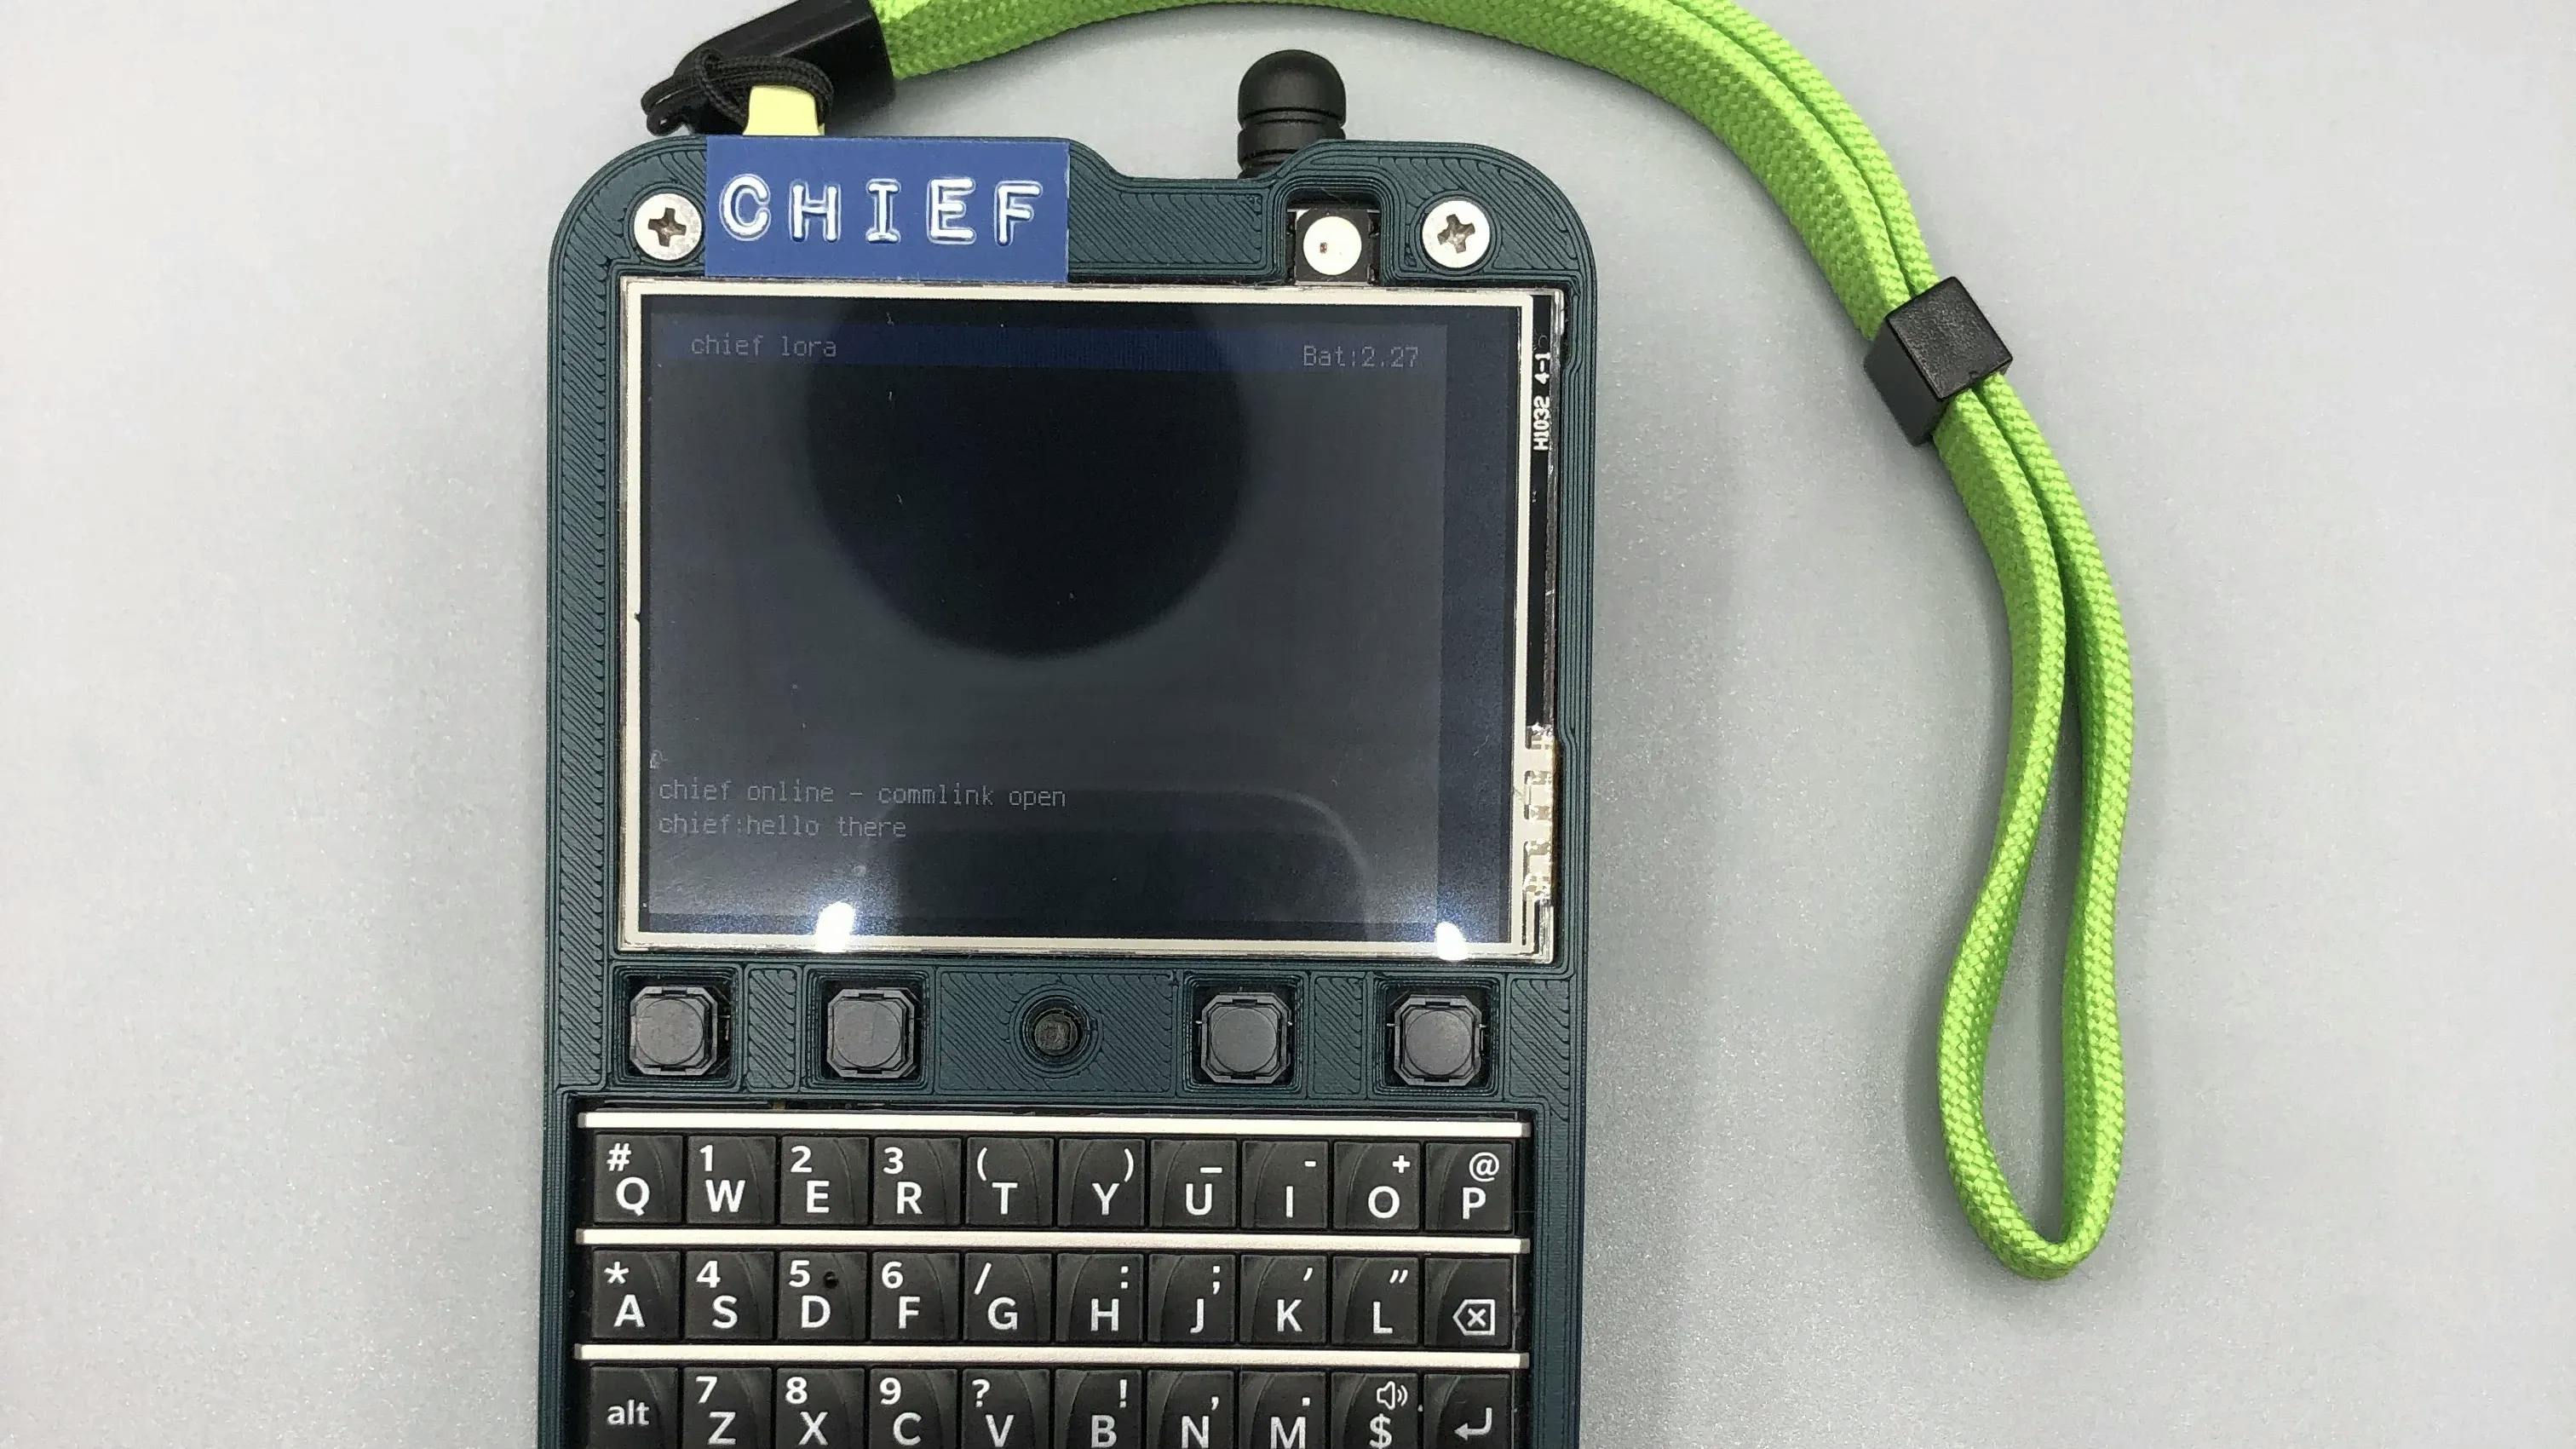
LoRa MSG
Since I learned about LoRa I was curious about getting a communicator. I always liked walkie-talkies, and given that I go camping a few times a year, having the ability to communicate in remote areas with people nearby would be handy. With that as my motivation I started to explore the ways to leverage LoRa devices to put together a communicator tool.
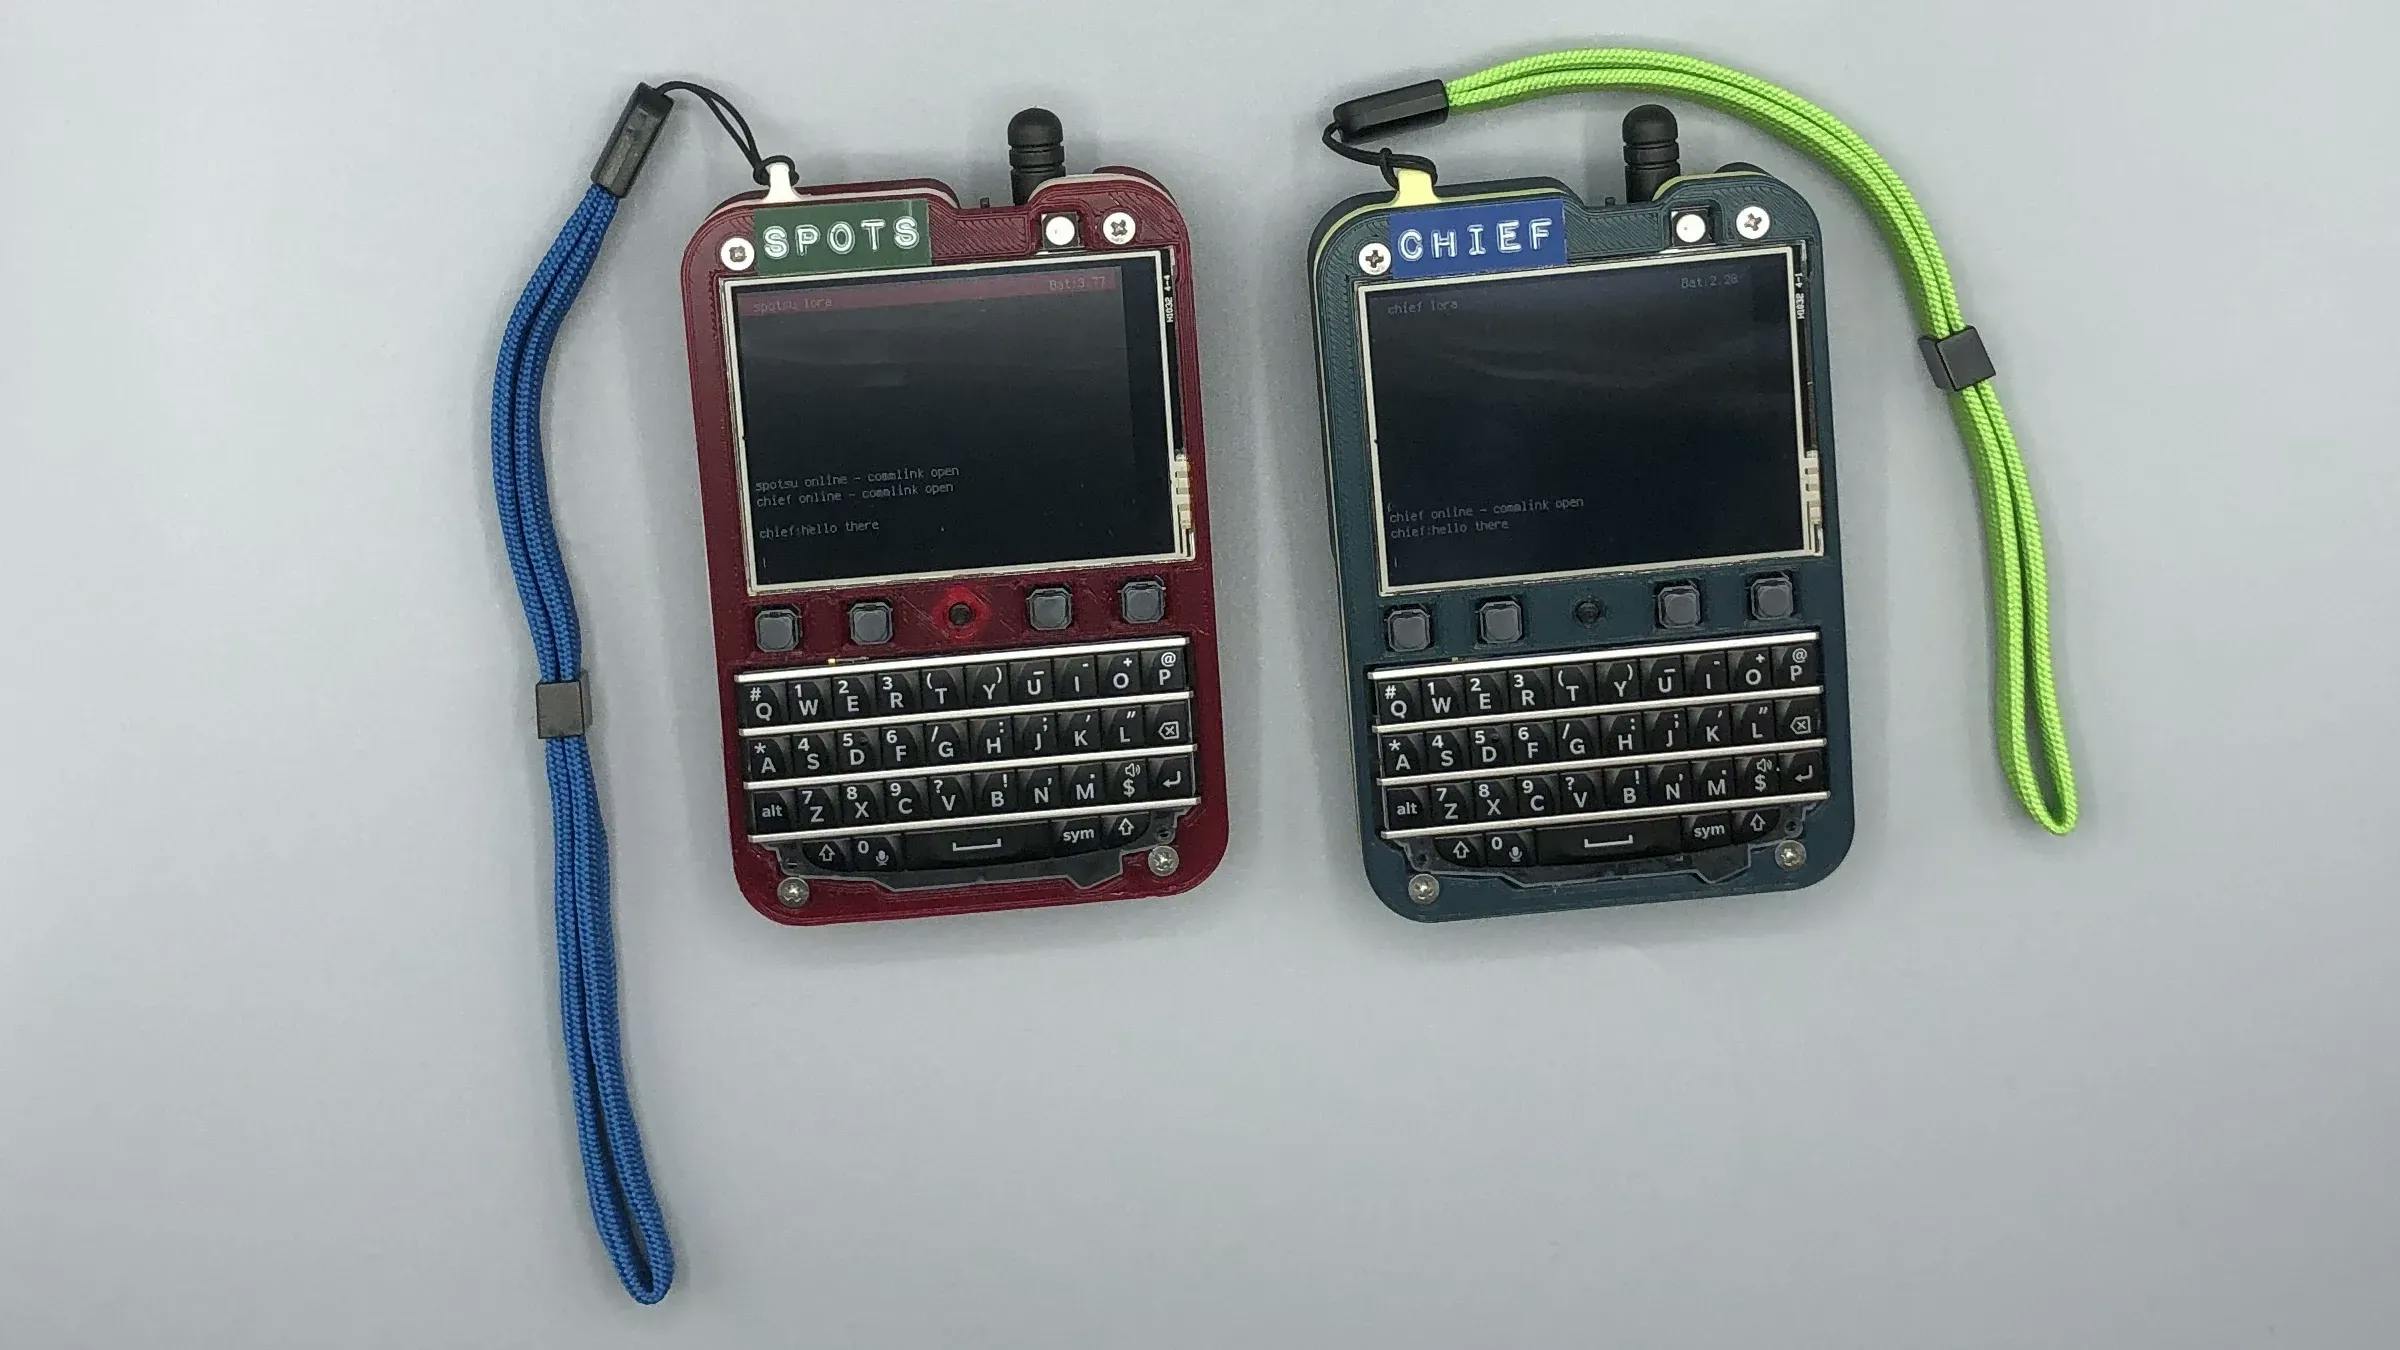
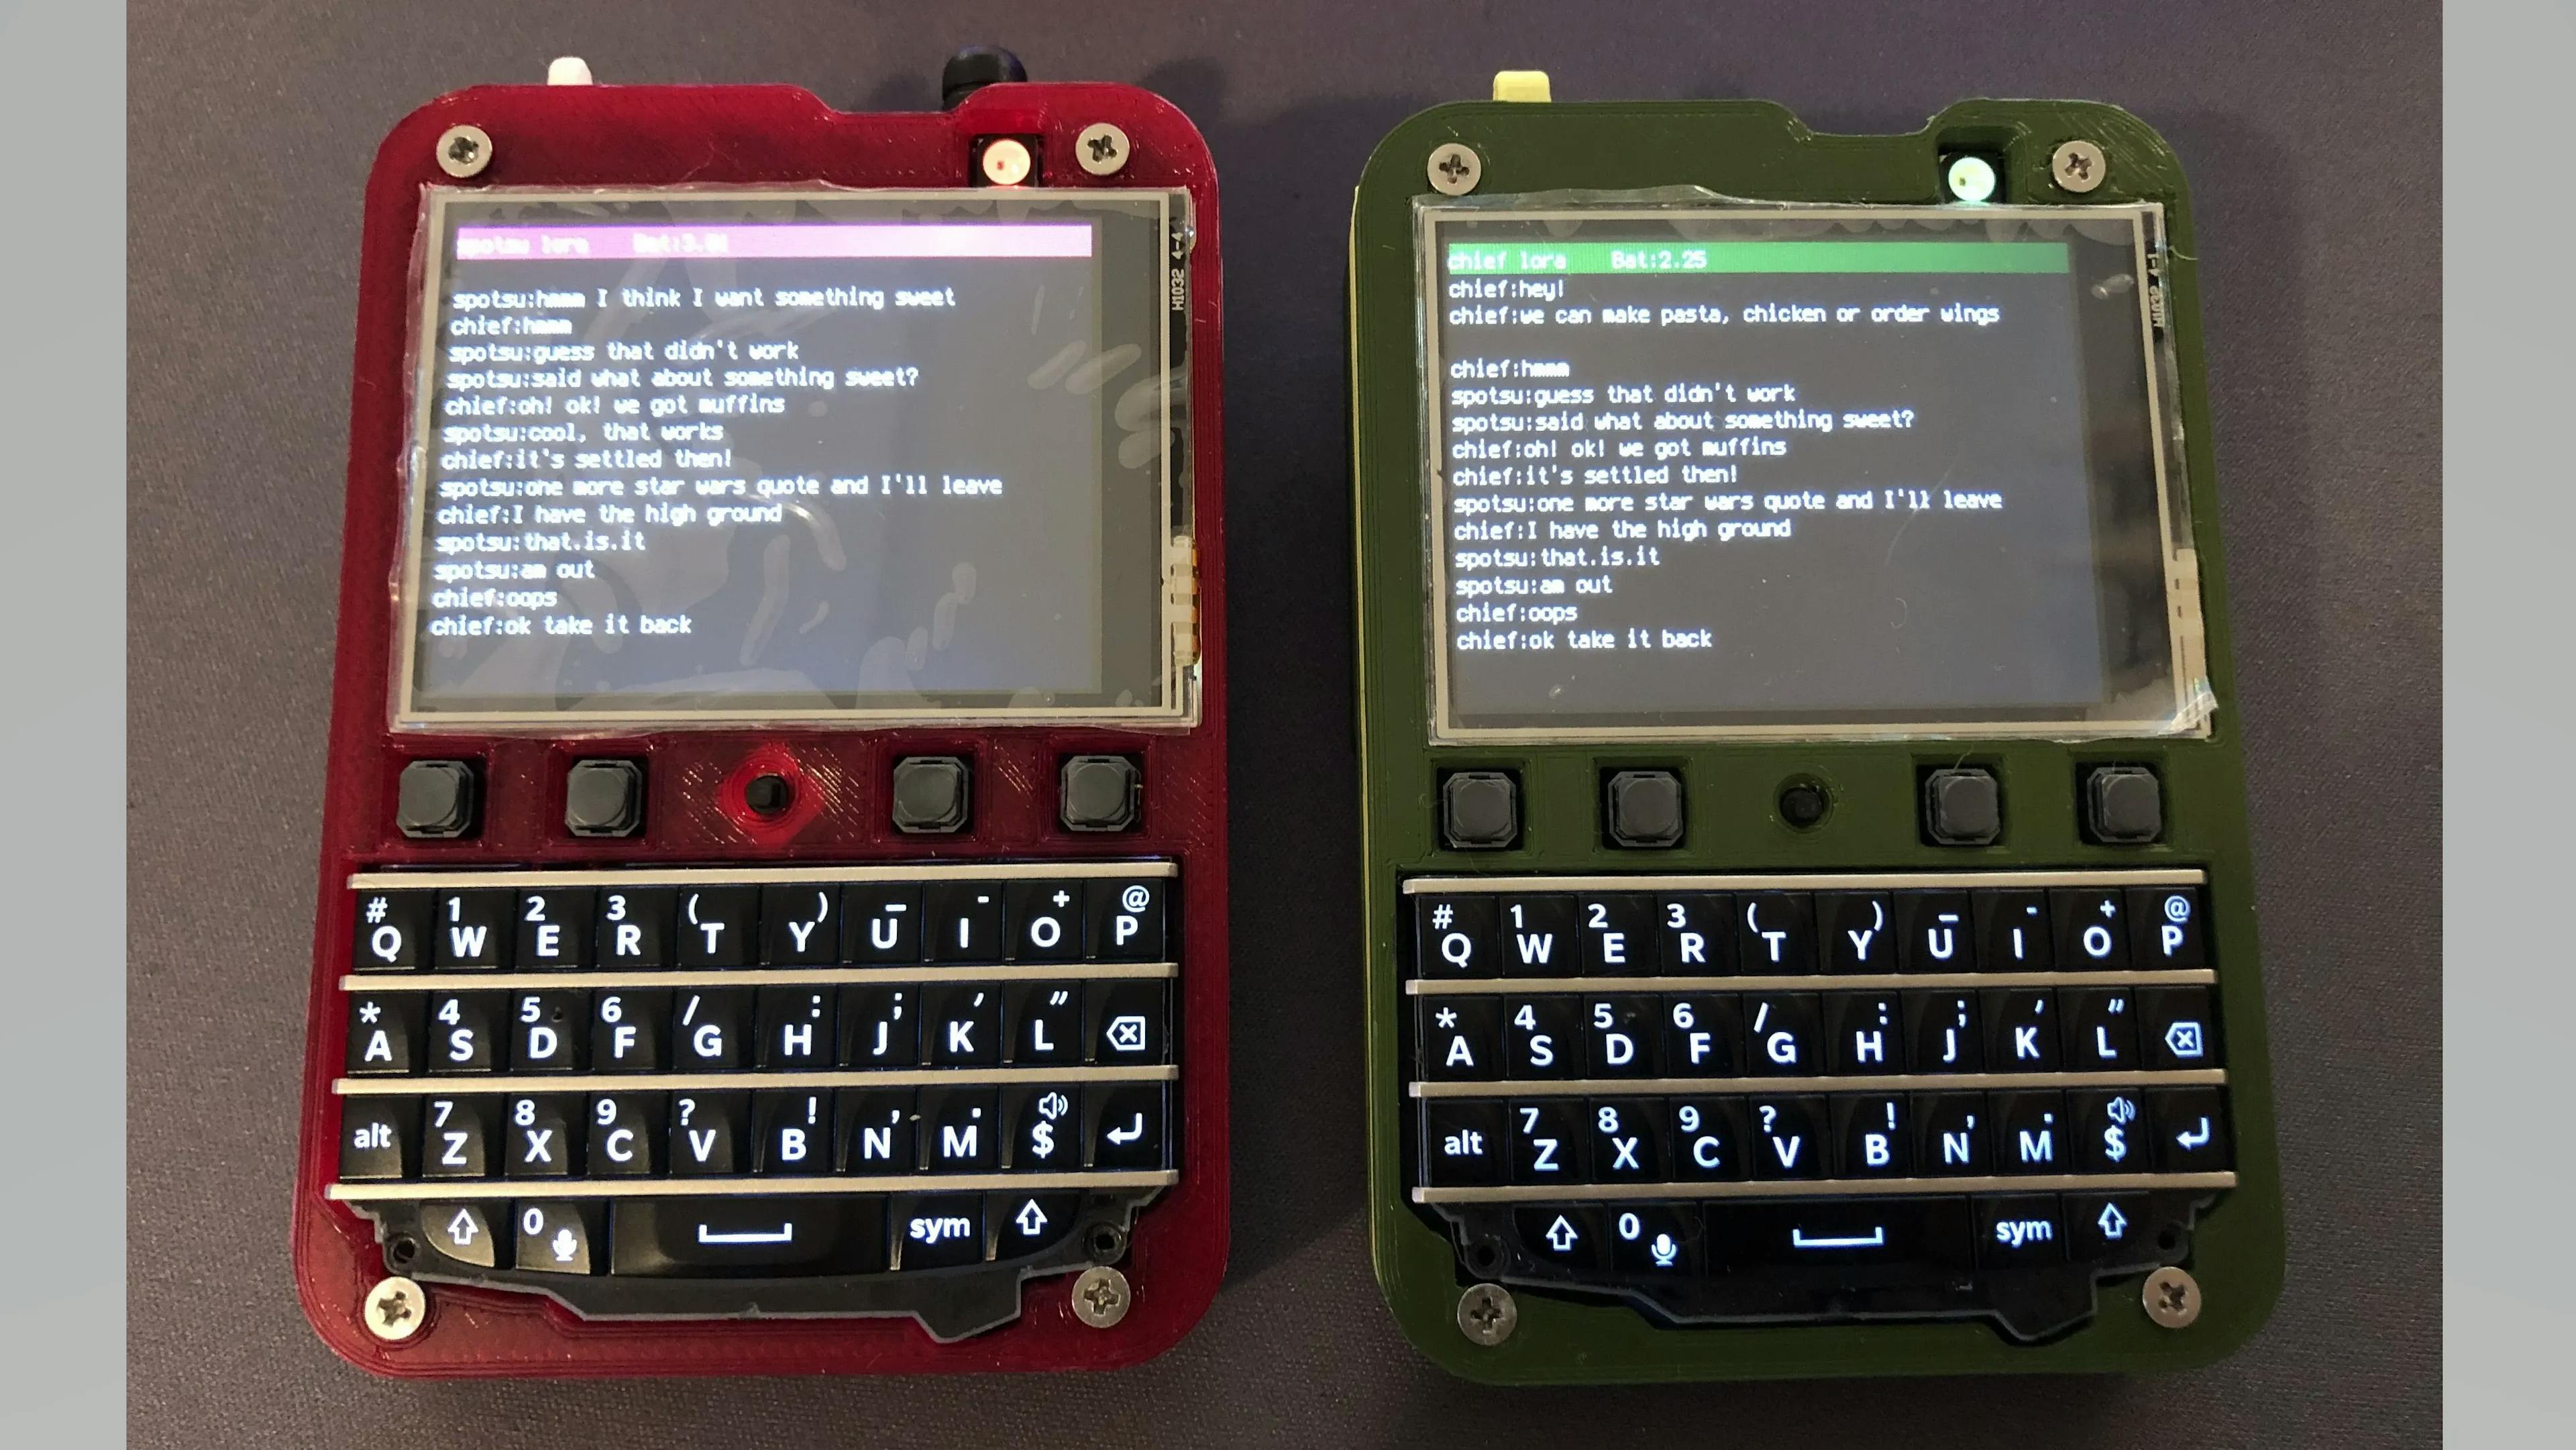
Here is the current solution, which is based on the keyboard FeatherWing, Adafruit feathers and circuit python
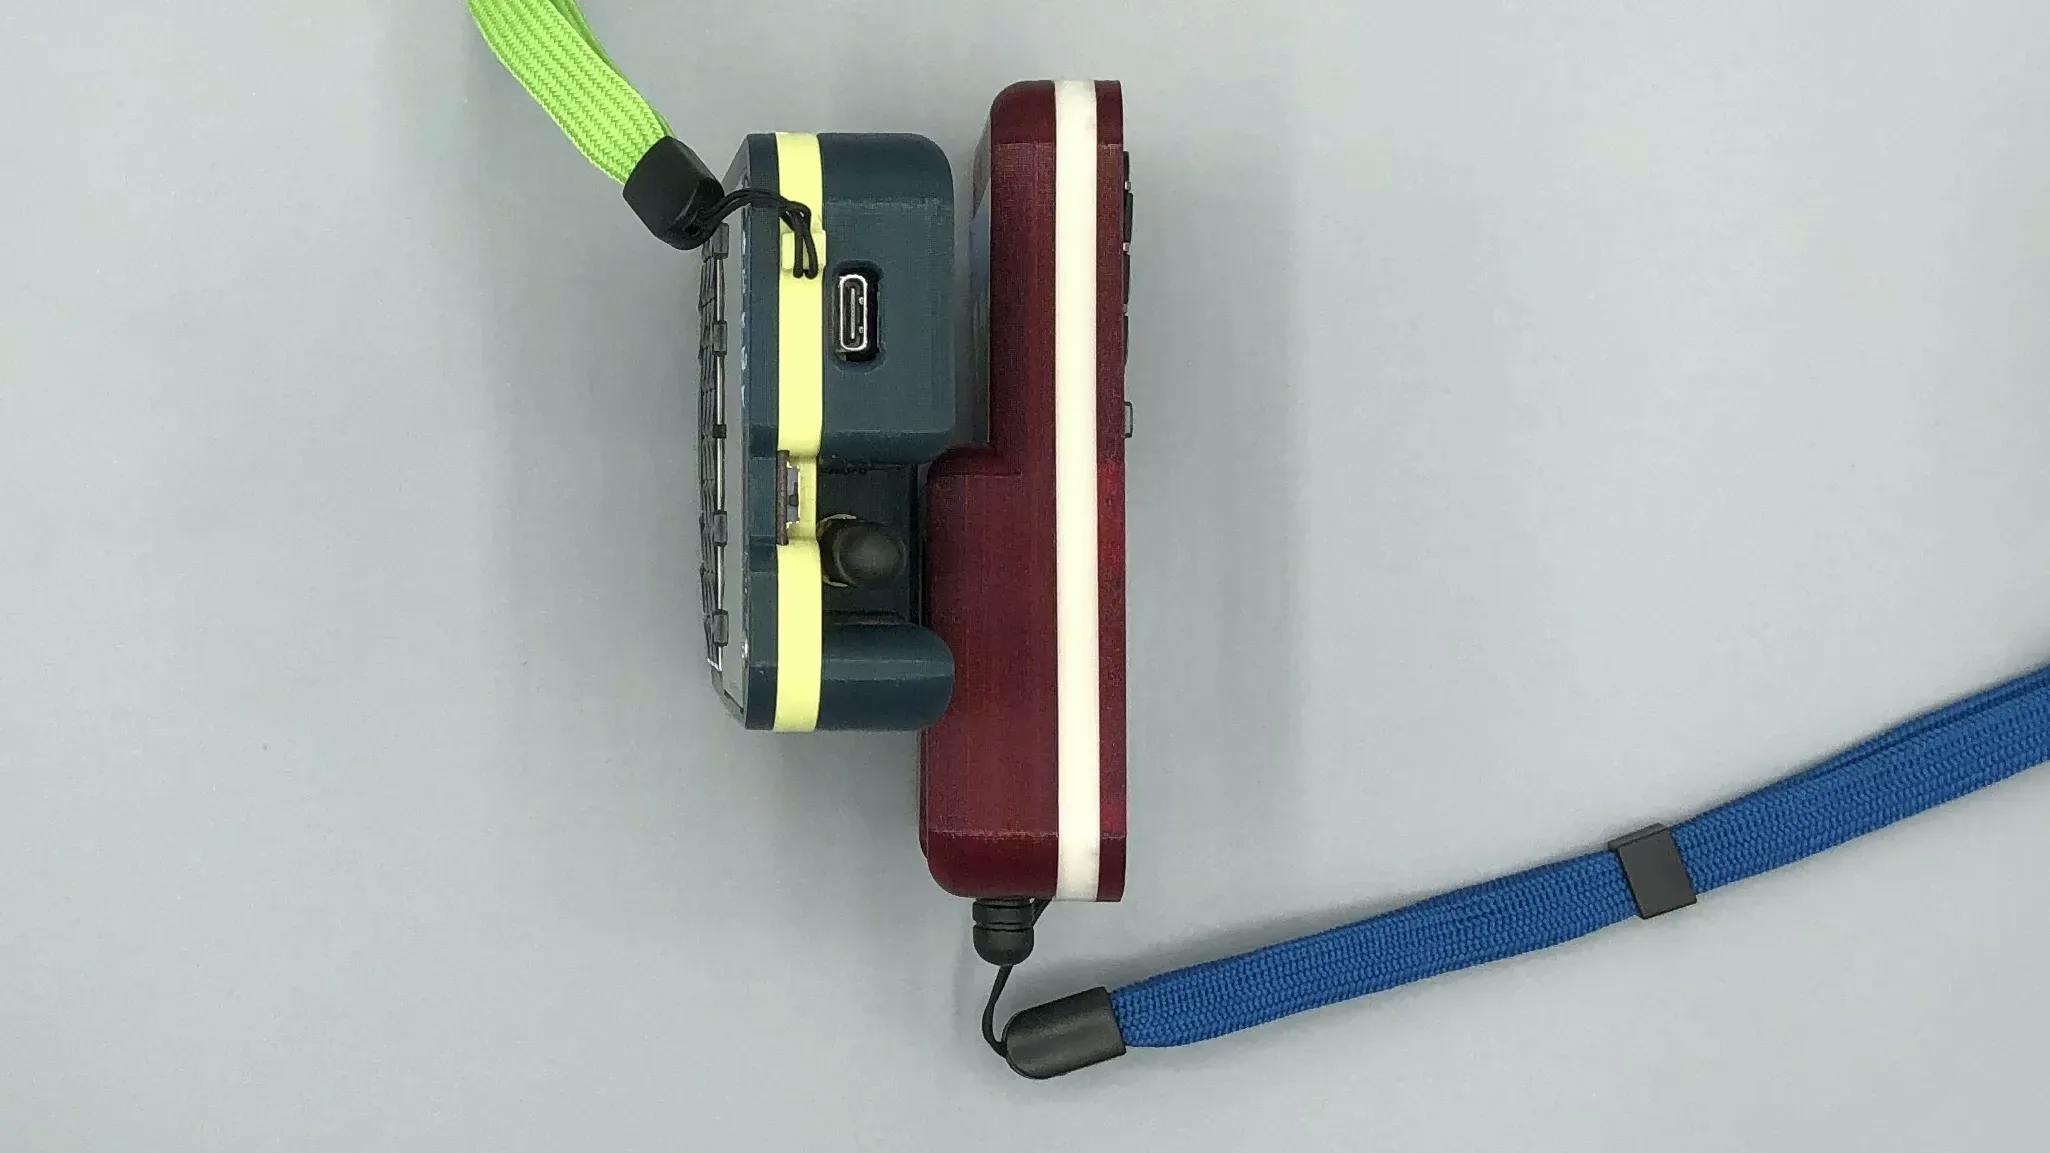
Solder Party put together a nice keyboard-screen combo basically replicating a blackberry. The package needs a FeatherWing added on the back to work, but once you add it, you are good to go. On their page they suggest the M0 with integrated LoRa as an option. Unfortunately that doesn't work with Circuit Python. The M0 has a paltry 40k of memory, which is enough for the LoRa scripts but not for the ones needed to operate the screen and keyboard. I plan to try using Arduino on the V2 which may be able to run on the M0. That could save ~10mm in thickness
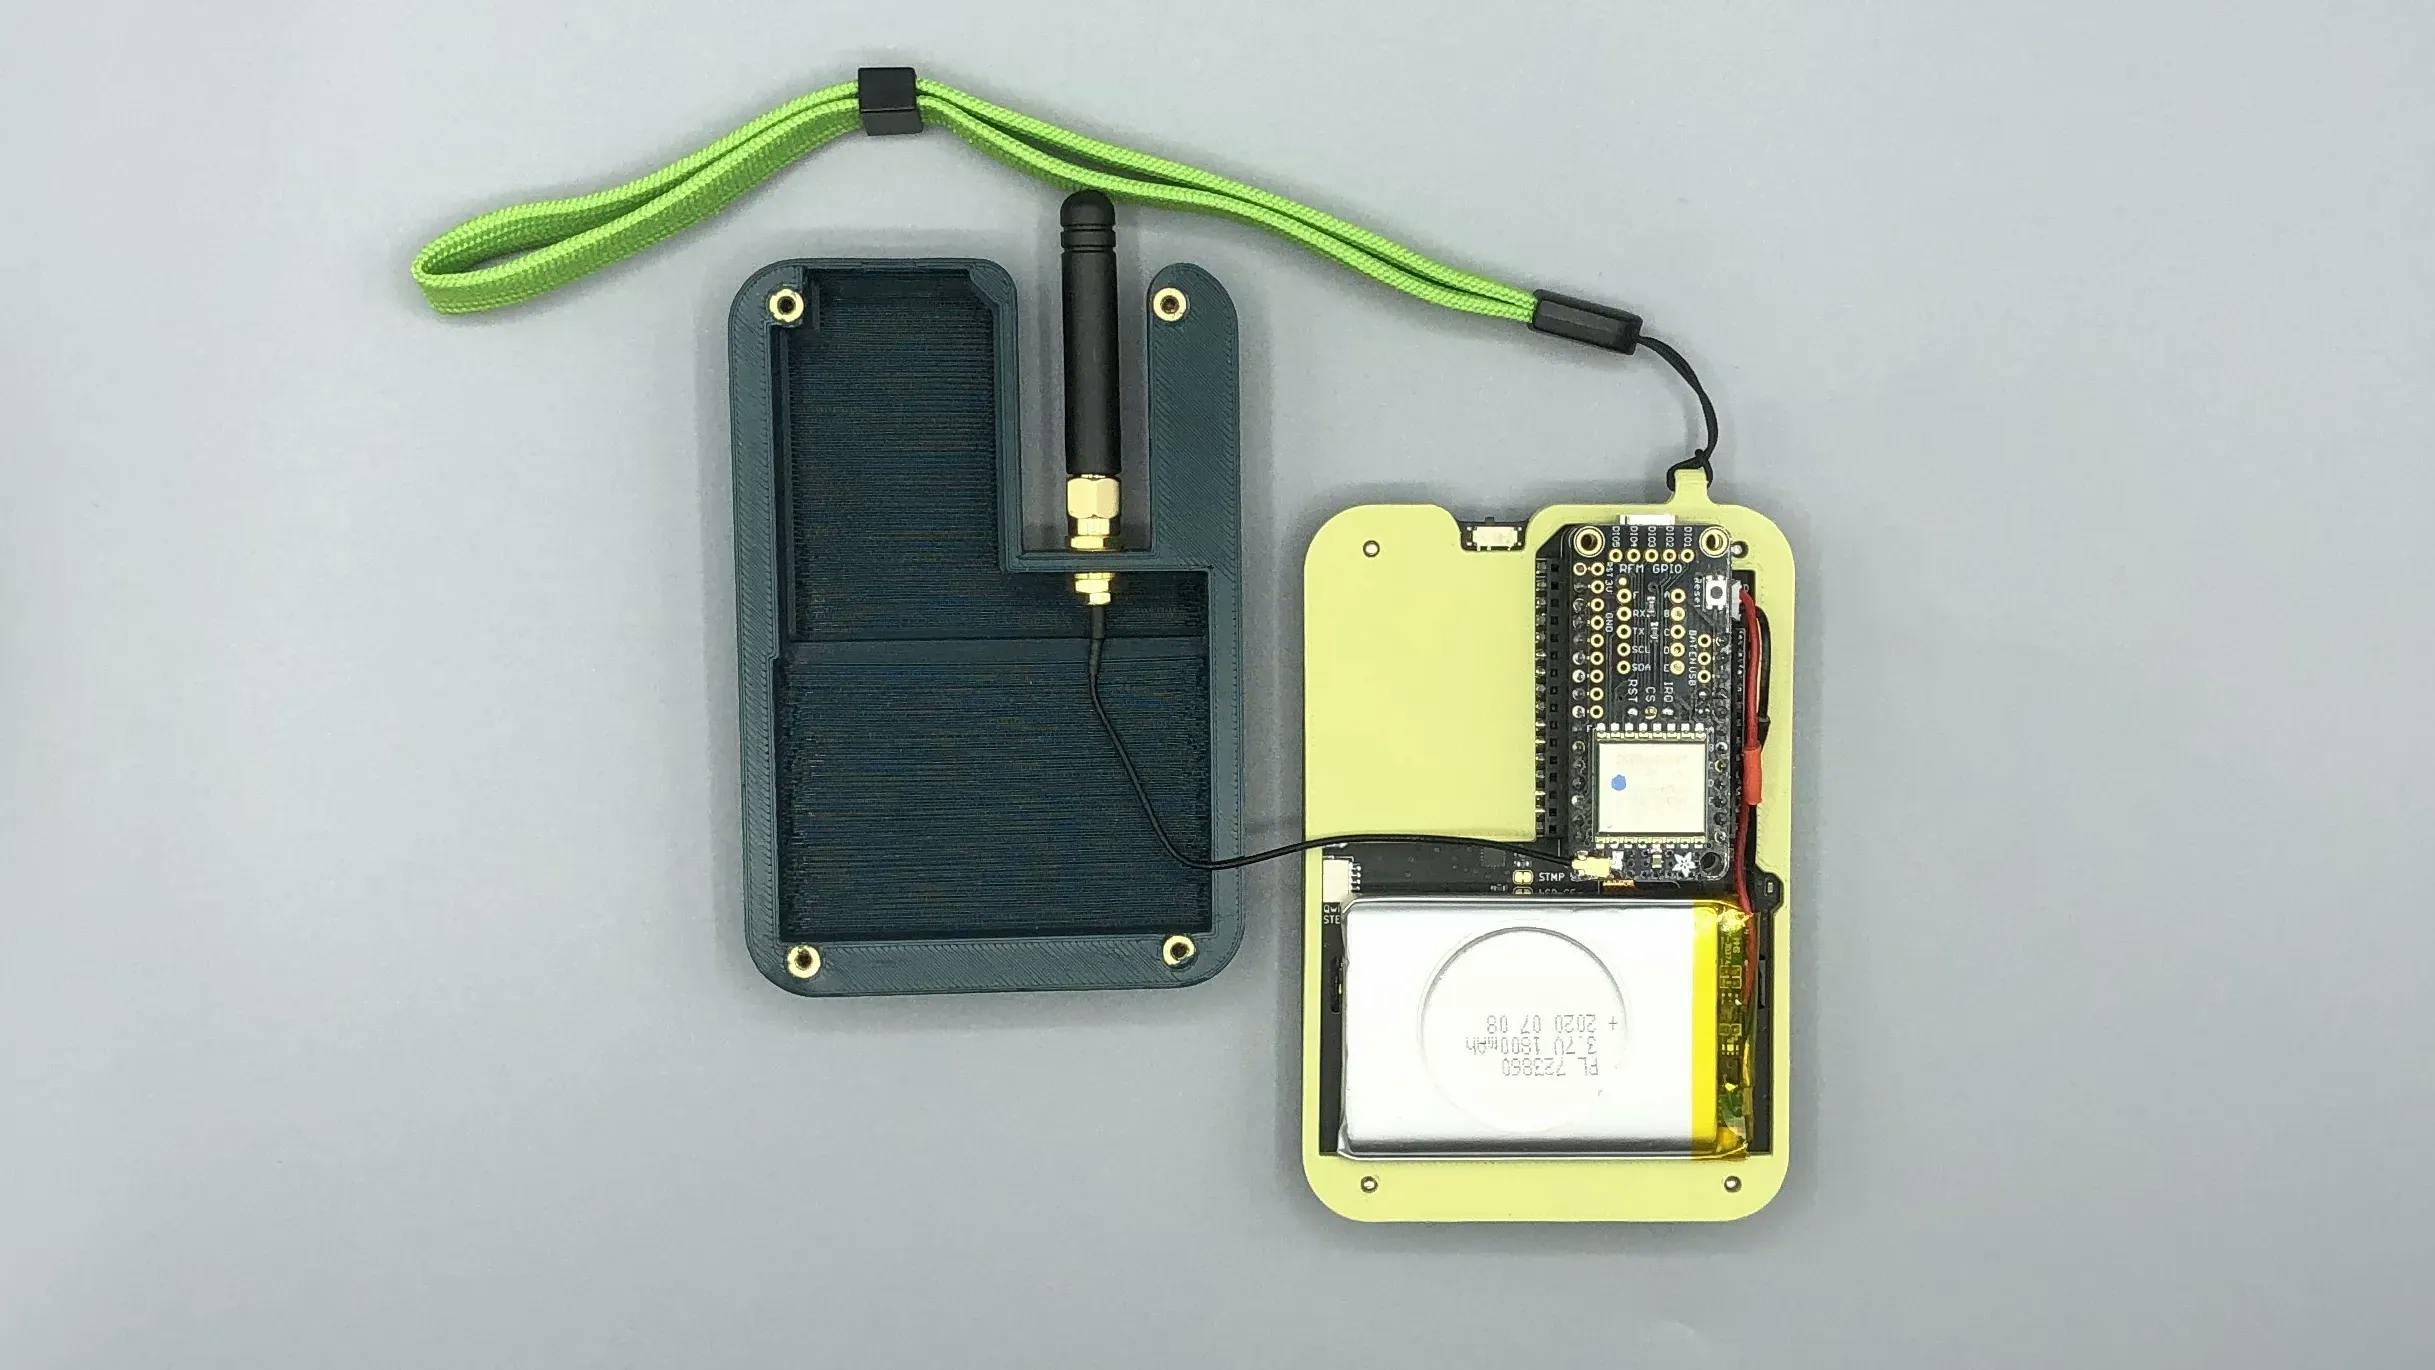
To work around this limitation I bought the M4 Feather and added the LoRa module to it. That worked right away.
Parts:
FeatherWing Keyboard from Solder Party - an elegant solution to providing a screen big enough for a messenger and a keyboard for user input.
Feather M4 - This is a fairly capable module, given the flexibility of the keyboard/lcd combo you could add some code to run other software besides the lora module for a more capable device.
LoRa FeatherWing - The radio chip, make sure to buy the one relevant to your region, 900 MHz (which gets software tuned to 915 MHz for the US)
Battery - Be careful with the polarity, for some reason he one I bought from amazon had the opposite than what the FeatherWing expects. If you get that wrong you'll see some white smoke and that is rarely a good sign. I think that Adafruit sells them with the right polarity, so don't assume that it is right or it is wrong, test it.
uFL antenna connector - The LoRa FeatherWing doesn't have one, you want this one because the space is limited and we want the antenna to point up.
Antenna - make sure to get one for right frequency
Heat Inserts - I really like how they look and ensure that the screws hold the thing together
M2.5 12mm countersunk screws - I used Philips ones, but ordered the hex ones. I think they'll look better
Wrist Lanyard Strap - Very optional, I think it looks cool and gives it a more retro feel
any header with enough pins for a feather

The sharing conundrum:
- I don't mind sharing the code I use or the STLs but I am having the following dilemmas:
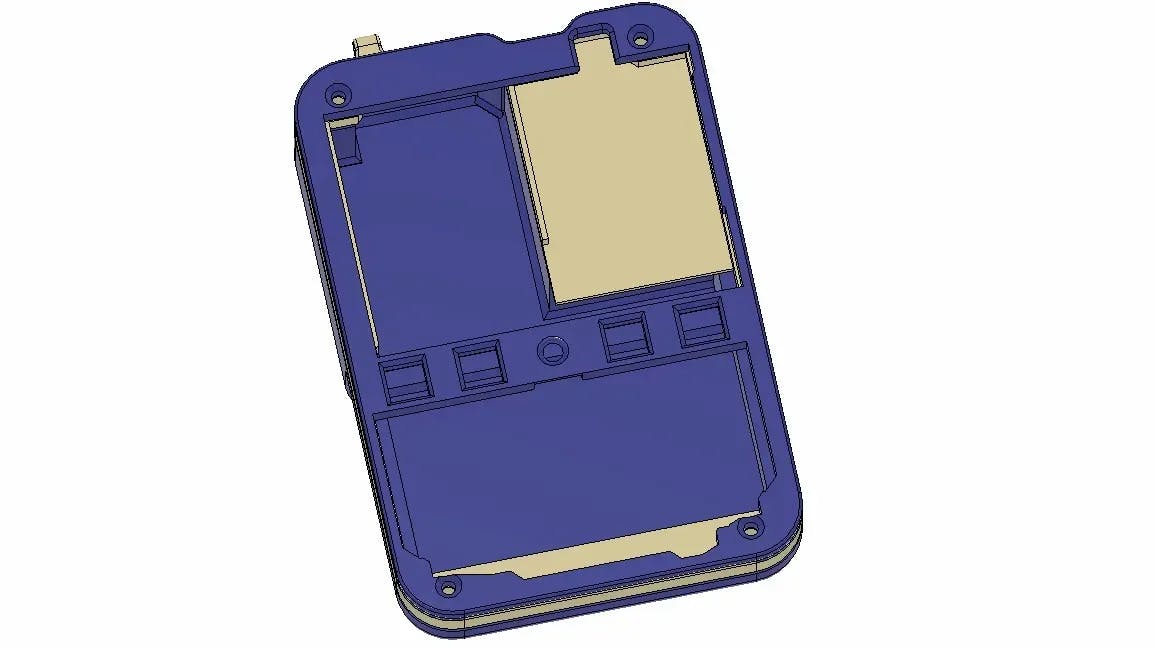
- The hardware is not perfectly replicated. The 2 units I got had different location for the keyboard. Also The soldering on the feathers left the USB-C connector at different heights. I fixed that by creating a couple of models and adjusted them on Fusion. You may have similar issues.
- The code is of veeery low quality. I can't stress this enough. It is basically a mishmash of the examples on the solder party website and adafruit. It is incomplete and probably buggy. Using it “as-is” is likely to lead to frustration.
That said:

The Fails:
My original intention was to make the LoRa msg a raspberry pi zero based project. The raspberry pi zero has plenty of power to run the LoRa module, a keyboard and a screen. In my tests the system works but it is too large size-wise.
Parts:
Lora Bonnet: An all-in-one solution to put on top of your raspberry pi zero to add LoRa capabilities
Raspberry Pi Zero W - you can use this one or the WH if you want to save yourself some soldering
screen - I had this one laying around. The addition of HDMI cables makes the whole package pretty big. I experimented with TFT screens and I was able to get them to work as “main” screens, with the terminal displaying and working there. But I had issues with sharing the SPI ports for the main screen and the LoRa module.
Outcome: Setup is straightforward and it works well as a dongle for a computer. The tiny screen on the bonnet isn't really useful for reading messages and it doesn't have a keyboard for input. For a keyboard, I planned on using the PocketType. The number of cables, connections and parts would have made the device the size of a brick.
Other fails involved trying a standalone LoRa module on a few pins and using the remaining pins for some small TFT screen. I had issues enabling the two SPI devices, but that may be a workable solution. At any rate the issues with the keyboard for input would still be there.
Next Steps: I plan on redoing the code on Arduino